Plus 2.X:Windows
Creation of Windows and Openings
It is advisable to expand the Visualization Box Window before starting to create new Windows and Openings.
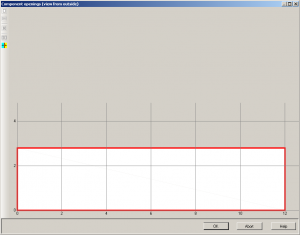
The "Component openings" window
First of all the component which should be windowed or opened needs to be selected thus clicked on. Then either the Windows/Openings Button needs to be used or Windows/Openings needs to be chosen after right clicking on the component.
Both actions lead to the the opening of the "Component openings" window. It makes sense to check the caption bar first and see whether the view is from outside or inside. The settings on the view in the "Component openings" window can be altered under the Options in the Visualization Box. Also the view can easily be switched using the "Change View from Inside/Outside" button ![]() in the "Component openings" window.
in the "Component openings" window.
Creating new windows and Openings
New windows and Openings can be either created using the "New" button ![]() or by right clicking onto the illustration of the component and choosing "New".
or by right clicking onto the illustration of the component and choosing "New".
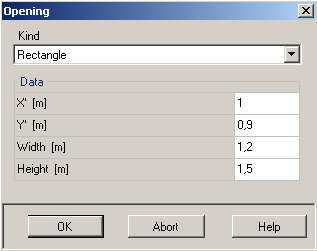
This makes the "Opening" window pop up. where kind (Rectangule,Triangle, Circle), exact position (with x- and y-coordinates) and size (width and height) of the requested opening can be entered
After that more windows and openings can be entered the same way. Also there is the possibility to copy and move the existing windows and openings using the "New Copy/Move" button ![]() by entering x- and y -coordinates.
There is a "Delete" button
by entering x- and y -coordinates.
There is a "Delete" button![]() to erase selected windows and openings and a "Select all" button
to erase selected windows and openings and a "Select all" button ![]() to select all windows and openings in the component.
to select all windows and openings in the component.
To save the changes, confirm with OK in the "Component openings" window.
After creating a window you might want to change its type. (For example if you created a window-door you might want to change the doors type to opque, else you might want to change a window into a mere opening) This is possible in the visualized component's general settings
Movie
Watch this movieto see how to place the windows the right way. This movie belongs to the second example.

